Are you having any PDF (Portable Document Format) file you wish to send as an attachment via email to friends or anyone but you were discourage/unable to send it due to the large size the file(s) possess. In this case, trying to compress/shrink the PDF file(s) will be the best solution to have the file(s) in smaller size.


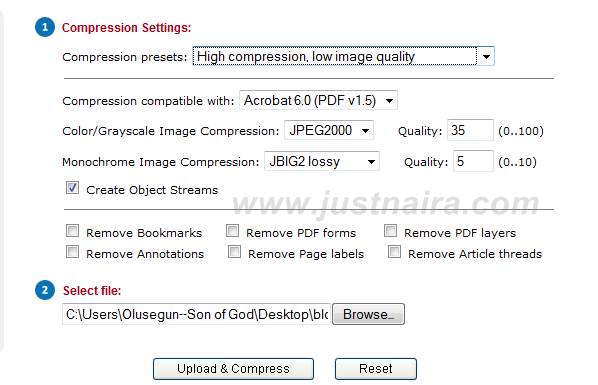
Neevia Technology PDF compressor is most convenient way to compress your PDF files online. You can select different compression settings from the settings menu. Upload your PDF file and Click on the Compress button. That’s all your file is compressed.
If you know of other easy method(s), don’t hesitate to share it with others via the comment box below.

Benefits of Shrunk or Compressed PDF Files
Compressed PDF files have many benefits but I will just try to mention a few of it:- File size would be decreased to a smaller size
- Shrunk PDF files makes sharing easy
- Downloading and Uploading would be faster
- Files would be easily accessible and archive and etc.
How to Compress PDF Files Online
To easily compress PDF files online, we are going to make use of a convenient and easy to use online tool known as Neevia Technology PDF compressor. With Neevia, different types of compression setting can be selected from the settings menu. All you need to do to compress your file is to upload your PDF file and Click on the Compress button.
Neevia Technology PDF compressor is most convenient way to compress your PDF files online. You can select different compression settings from the settings menu. Upload your PDF file and Click on the Compress button. That’s all your file is compressed.
How to Compress PDF files on MAC OS
- The method stated above works for all operating system, but MAC users can use their machine more easily to compress a PDF file in seconds with its in-built application (Preview.app). Follow the steps below to compress PDF files with MAC.
- The very first process is open the PDF file with Preview application.
- After opening the file choose “File” at the top of the screen and then click on “Print” or You can also the use the shortcut key (“Command key” + Letter “P”) to print the file, this will pop up a dropdown menu.
- On the dropdown menu, you can see a button in the bottom left-hand corner labeled as “PDF”. Click the button and another dropdown menu will appear, immediately below the “PDF” button.
- Click on the “Compress PDF” from this dropdown menu and now you can see a window indicating the compression is taking place.
- After the compression a Save window will appear, here you need to type the name of the file and location of the file and click on the Save button.
If you know of other easy method(s), don’t hesitate to share it with others via the comment box below.